Create and Distribute Email Newsletters with Microsoft Publisher
Categories: Demonstrations Howtos Information Instruction Office 365
I stumbled across a feature of Microsoft Publisher the other day I was not aware of. Publisher is capable of not only creating an email newsletter ( e-newsletter), but it will also send out the newsletter in the body text of your email.
There are a few tips that you will need to be aware of before you try to create and send out your own email newsletter.
- Your newsletter can only be one single page long. That page can be very long in length. However, it will only send out the first page if you have multiple pages in the Publisher file. (On the Page Design tab in Publisher, choose the Page Setup option under the Size drop-down button. This will allow you to manually change the size of the one and only page on your email newsletter. Also, keep in mind that narrow pages work better for cell phones.)
- If you are including multiple photos, be sure to compress all of the images before sending the newsletter. Many email providers will not accept emails that are over a certain size ~20 Megabytes. (You can easily do this for all photos by right-clicking on a photo and choosing Format Picture. Under the Picture tab, select the Compress… button. Change Target Output to Web, choose the apply to all pictures option and click Compress.)
- Be sure to include photos, links or any other items that will make the newsletter stand out.
- Your Microsoft Outlook will need to set up and signed into for Publisher to be able to send your newsletter.
- Before distributing the newsletter, send it to your email and coworkers if possible to check for errors.
- Create a contact group in your Outlook with all contacts who you will send the email to. Outlook contact groups are a great way to easily create and manage email addresses.
- When sending your newsletter, use the BCC (Blind Carbon Copy) option to input email addresses. This will stop the recipients from replying to everyone on the email contact group.
Sending your Newsletter
After you have created, proofed and edited your newsletter, you can start the process to send it.
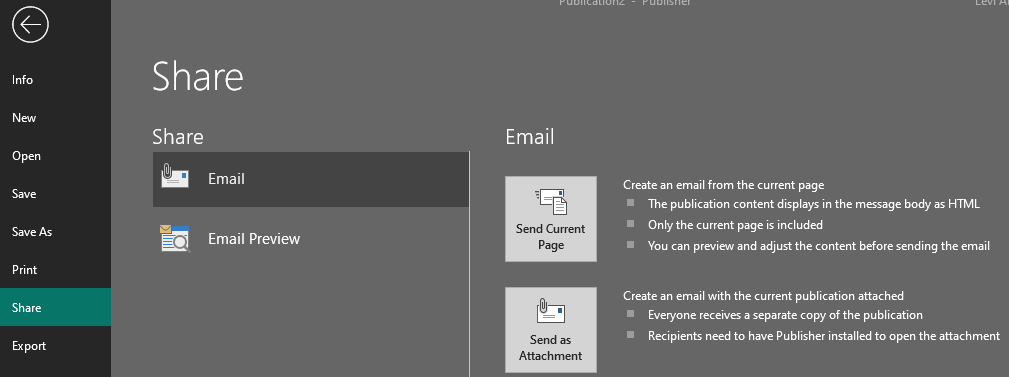
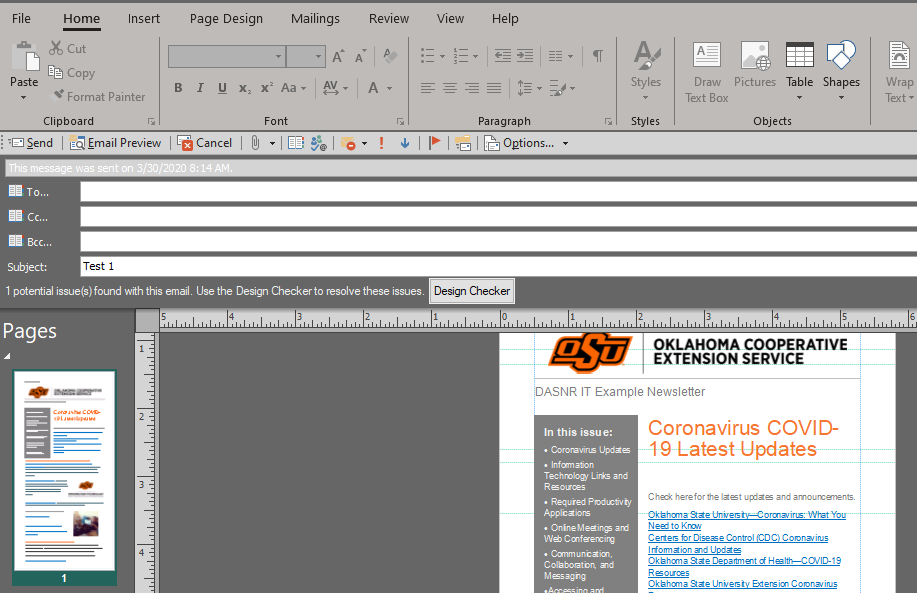
- In your Publisher, click the File button and then select the Share option in the menu. Under the Email section, choose the Send Current Page option. (you will have a chance to view and adjust the newsletter before sending it.)
- Enter your email address or contact group that you would like to send your newsletter to. Since this utilizes Outlook for sending emails, you can create and use a contact group to manage who will receive the newsletter. (The To, CC, and BCC buttons open the Outlook address book.)
- Change the Subject line to the title of your newsletter and the date of the current edition. (Example DASNR IT Newsletter: March 2020)
- When all edits are finished, simply click Send and the newsletter will be on its way.