Sync Files with OneDrive in Windows
With OneDrive, you can sync files between your computer and the cloud, so you can get to your files from anywhere – your computer, your mobile device, and even through a web browser by accessing CowboyMail. If you add, change, or delete a file or folder in your OneDrive folder, the file or folder is added, changed, or deleted on the OneDrive website and vice versa. You can work with your synced files directly in File Explorer and access your files even when you’re offline. Whenever you’re back online, any changes that you or others make will sync automatically.
Connecting Your Computer to OneDrive
If you’re using Windows 10, your computer already has the OneDrive app installed.
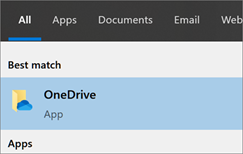
- Select the Start button, search for “OneDrive”, and then open it.
- When OneDrive Setup starts, enter your OKState email address, and select Sign in.
- If it asks, be sure to select the option for Work or School Account.
- Finish the setup wizard and you will be able to access your OneDrive files using the File Explorer on your taskbar.

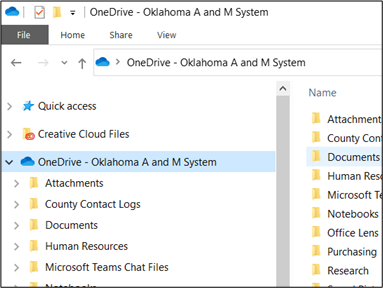
- Your OneDrive folder will be located on the navigation menu to the left.
Syncing Shared Folders to Your Computer
When someone shares a folder with you, it appears in the Shared section of your OneDrive online via CowboyMail. If you have Edit permissions to those shared folders, you can add them to the My files section of your OneDrive to make them easier to access and work with.
Notes:
- You can only add shared folders to your OneDrive, not individual shared files.
- Shared folders added to your OneDrive do not use any of your OneDrive storage space. They only count against the folder owner’s storage space.
- You can also access shared folders from your Shared list on OneDrive.com or in the OneDrive mobile apps. You can still copy, move, edit, rename, share, and delete anything in the folder.
Syncing Shared Folders
- Sign in to CowboyMail on your browser with your OKEY credentials and click the Waffle Icon and choose OneDrive.
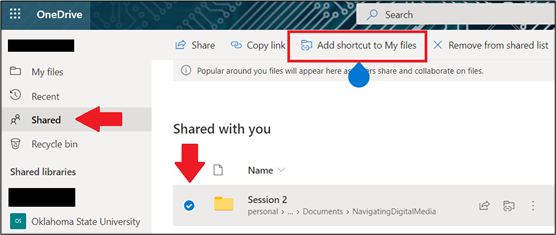
- On the left navigation pane, under OneDrive, select Shared.
- Locate the folder you want to add, select the circle to the left of the folder’s title, and then select Add shortcut to OneDrive on the top menu. Or right-click a folder and select Add shortcut to OneDrive.
- Open your File Explorer again and you’ll notice the shared folder will now be available under your main OneDrive folder. From there you can add or view files within that folder.

In Conclusion
Microsoft has made it very easy to sync shared folders to your computer. If you get stuck or would like any further information about shared folders in OneDrive, please contact your respective Computer Support Specialist.
How to Use Breakout Rooms in Zoom
Breakout rooms allow you to split your Zoom meeting in up to 50 separate sessions. The meeting host can choose to split the participants of the meeting into these separate sessions automatically or manually, or they can allow participants to select and enter breakout sessions as they please. The host can switch between sessions at any time.
Limitations
By default, only the host or co-host can assign participants to breakout rooms. They can choose to allow participants to choose their own room, but this must be done in the meeting when launching the breakout rooms.
Users who join a Zoom meeting from the Zoom Mobile App, their phone using the call-in numbers, or from a web browser can participate in breakout rooms but cannot manage them, so your designated host or co-hosts need to join using the Zoom client on a desktop or laptop.
Those participants who called-in and those joining via a web browser also will not be able to select their own breakout session and will have to be placed into a room by a host or co-host. Also, users will have to update their client to at least version 5.3.0 or later before being able to select their own room as well.
If the meeting is being recorded to the Zoom Cloud, only the main room will be recorded, not the individual breakout rooms. Alternatively, when a participant chooses to record their session using the “Local Recording” option, the recording will record the room in which that participant resides.
Multiple participants can record locally to their devices but hosts will have to manually select which participants are allowed during the meeting by hovering over their name, clicking the More option, and choosing the option Allow Record.
Verifying Breakout Rooms Are Enabled for Your Meetings
Sign into the Zoom web portal at dasnr.zoom.us with your OSU email address and password.
In the navigation menu, click Settings.
Navigate to the Breakout Room option under the In Meeting (Advanced) section and verify that the setting is enabled.

If the setting is disabled, click the toggle to enable it. If a verification dialog displays, choose Turn On to verify the change.
Creating Your Breakout Rooms
After the meeting has started, you can click the Breakout Rooms button on the main bar at any time during the meeting.

Select the number of rooms you would like to create, and how you would like to assign your participants to those rooms:
- Automatically: Let Zoom split your participants up evenly into each of the rooms.
- Manually: Choose which participants you would like in each room.
- Let participants choose room: Participants can select and enter rooms on their own.

Options for Breakout Rooms
After creating the breakout rooms, click Options (on Windows) or the gear icon (on macOS) to view additional breakout rooms options.
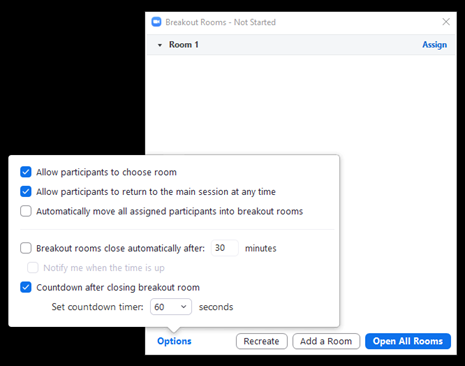
Check any options that you would like to use for your breakout rooms.
- Allow participants to choose room: Participants can select and enter rooms on their own once rooms are launched.
- Allow participants to return to the main session at any time: If this option is checked, the participants can move back to the main session from their meeting controls. If this is disabled, they need to wait for the host or co-host to end the breakout rooms.
- Automatically move all assigned participants into breakout rooms: Checking this option will move all participants into the breakout rooms automatically. If this option is unchecked, the participants will need to click Join to be added to the breakout room.
- Auto close breakout rooms after () minutes: If this option is checked, the breakout rooms will automatically end after the configured time.
- Notify me when the time is up: If this option is checked, the host and co-hosts will be notified when the breakout room time is up.
- Set Countdown timer: If this option is checked, the participants will be given a countdown of how much time they have left before being returned to the main room.
Follow the steps below to assign participants to rooms or click Open All Rooms to start the breakout rooms.
Assigning Participants to Rooms
To assign participants to your rooms, select Assign next to the room you wish to assign participants to and select the participants you want to assign to that room. Repeat this for each room.

Once a participant has been assigned (manually or automatically), the number of participants will show in place of the Assign button.
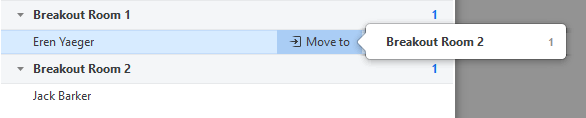
After manually or automatically assigning participants to rooms, you can rearrange the participants. Participants who are not assigned to breakout sessions will remain in the main meeting when the rooms are started.
- Move to (participant): Select a room to move the participant to.
- Exchange (participant): Select a participant in another room to swap the selected participant with.

- Delete Room: Delete the selected room.
- Recreate:
- Recreate all Rooms: Deletes existing breakout rooms and allows the host/co-host to create new ones.
- Recover to pre-assigned rooms: Recreate the breakout rooms with the pre-assigned arrangement. This is only available if using the pre-assign breakout rooms feature.
- Add a Room: Add another breakout room.
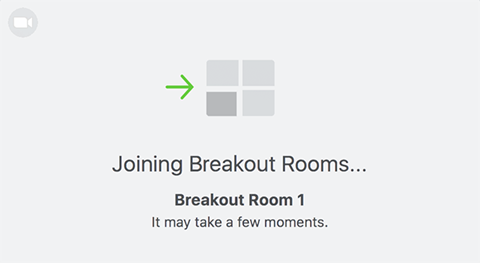
- Open All Rooms: Breakout rooms are opened and all assigned participants will be moved to their respective rooms after confirming the prompt to join the breakout room. If allowing participants to choose their own room, they can open the list of rooms and choose which to join. The host, or co-host who launched the breakout rooms and the original host, will be left in the main meeting until they manually join a room. The participants (and the host/co-host when manually joining a room) will see the following message shown when joining the breakout room.
Managing Breakout Rooms in Progress
Once the breakout rooms have been started, the assigned participants will be asked to join the Breakout Session. The host, or co-host that launched the breakouts and the original host, will stay in the main meeting until joining a session manually. If a participant has not joined the session yet, it will be noted by (not joined) next to their name.
- Join: Join the breakout room.
- Leave: Leave the room and return to the main meeting (only shows when in a breakout room).
- Close All Rooms: Stops all rooms after a 60 second countdown, which is shown to the host, co-hosts, and participants, and returns all participants back to the main meeting.
The host or co-hosts can broadcast a message to all breakout rooms. This can be done from the main session or from within a breakout room. Click Broadcast a message to all, enter your message and click Broadcast.
In Conclusion
Breakout Rooms are a great way to open up your Zoom meeting to different techniques and ideas and a great way to expand your toolset for your trainings or In-Services. Like with all things, practice makes perfect, and as always, if you would like further information or assistance with Breakout Rooms in Zoom, please contact your designated Computer Support Specialist.